So I finally decided I can't avoid this stupidly long post and its about time I get around to teaching people how to make their very own Deathjack.I can not urge you enough to read the entire post before building your own as I made plentiful mistakes and I want you to learn from my suffering!
Well lets start off with the basics.
1. Obtain a Deathjack box with full pieces!
 |
| These are all the pieces that come with the DJ be sure you have them all! (Forgot: Large base) |
2. Alright so now we have all our pieces. Be sure you soak them in some soapy water and scrub them clean using a small brush such as a tooth brush (No pic. Did that before I planned this post!)
3. The first thing I like to do when building minis is make a cool basing so that I know exactly how I have to pose my model. This is me showing a rough draft of the base. Material used was concrete scraps that I had from my eagle project. Remember always be on the lookout for modeling supplies for free! Next you will notice that I used gorilla glue.... DO NOT DO THIS! Perhaps since this was my first time I used this glue but it got really foamy and leaked all over the concrete and I was not pleased with the results in the slightest.
4. So now you have found some random supplys and made yourself a nifty base. Next you will need to find a dynamic and stable pose that you think will work well with the base. I decided to show the DJ stepping up on a rock while pushing off his back legs. For the next step we might as well do the legs so we don't forget our nifty plan!
 |
| As you can see here I am pinning the legs for extra strength as well as more modeling flexibility | . | |
|
|
Note: Many modelers prefer to drill the side with a peg and then insert a small metal rod like I did except then they paint the tip and add the leg so they can mark where they must drill next. I personally just eyeball it and deal with my failings :).
5. Well now that we have 1 leg done of course we must do the same to the other leg!
 |
| Thankfully this is a bad photo but this was my attempt to show how drilling too long can cause you to drill through a leg (-_-) |
6. Now we must make sure all 4 pins (2 in legs 2 in pelvis.) are glued in and will stay nice and tight! Next as the picture shows we must glue the legs together as you can see not too dynamic but still something more original than the bland straight pose.
 |
| With the pines glued in place these legs will be a great support and will increase survival if this model is dropped. |
|
|
Note: Another mistake I realized as I built this was the pegs on the pelvis were blocking the set up I wanted for the legs and so had to be filed down thinner until they can slide in and make for a strong but cool pose!
7. Now that we have our legs built we shall move onto the arms and torso! For the skulls on the shoulders I decided that the wells and the supporting frame was more than enough for the super glue to make a strong bond with little trouble and I chose not to pin this.
8. Now that the shoulders are done we are onto the hardest part of the project! I decided that not only will I be so bold as to pin this model but I would magnetize him as well! Although there is no practical use for him having magnetic arms it gives him a nifty posibility and allows for easy transportation :)
 |
| 7/16" x 1x16" are the magnets you should be using.... I was too cheap/dumb to buy the proper size so I had to clip some huge magnets down to proper size. |
 |
| As you can tell if the magnets are clipped it doesn't need to be perfectly round just make sure its deep in there and that you use plenty of glue! |
 |
| Blurry photo of me cutting a magnet with dikes. |
Note: As stated I highly recommend the proper size magnets! If you do decide to take my route please use proper eyeware! Also if you have clumsy hands be sure to wear gloves! I used basic dikes. (known as wire cutters in other places.) P.S. Do not test your magnets until you let the glue dry for 24hrs or else you might pull them straight off and cause you to do this again!
9. Next you will want to clip some more magnets to add on to the arms. I unfortunately do not know which size that you should purchase.. So best of luck there :( Sorry! I personally would try a couple of 5/16" x 1/8" on the arm. Although typically its easier to purchase 4 of the larger magnets and clip the ones on the arms until you find a suitable size.
 |
| Sorry about the picture but I wanted to show the travesty that is gorilla glue as well as one arm magnetized with a cut up magnet. |
10. Next up I decided that the hands needed to be finished. This means clipping the claw pieces off the sprue as well as the second half of the hand. As I was determined to pin all my pieces as much as physically possible I drilled all the hands.
 |
| As you can tell I like to test the hole by putting the rod into it and making sure it can stand unsupported. |
11. Now I'm sure you all think I did the right thing and drilled the spikes and pinned them to the hand right? WRONG! I got far too lazy and decided that they would be able to glue on and stay on just fine. LIES!
 |
| The momentarily finished product until fate teaches me I must pin the whole world! MUHAHAHAH!! |
|
12.Next up we go back to the torso and attempt to finish up the body before the head goes on! I decided I didn't want to pin the cage and the soul and surprisingly still haven't (Although I did have to redo them later...) Hopefully I won't ever have to pin these things :p
 |
| If you choose to pin these be careful on the round bottom of the souls as the drill can slip and can cause serious harm! |
|
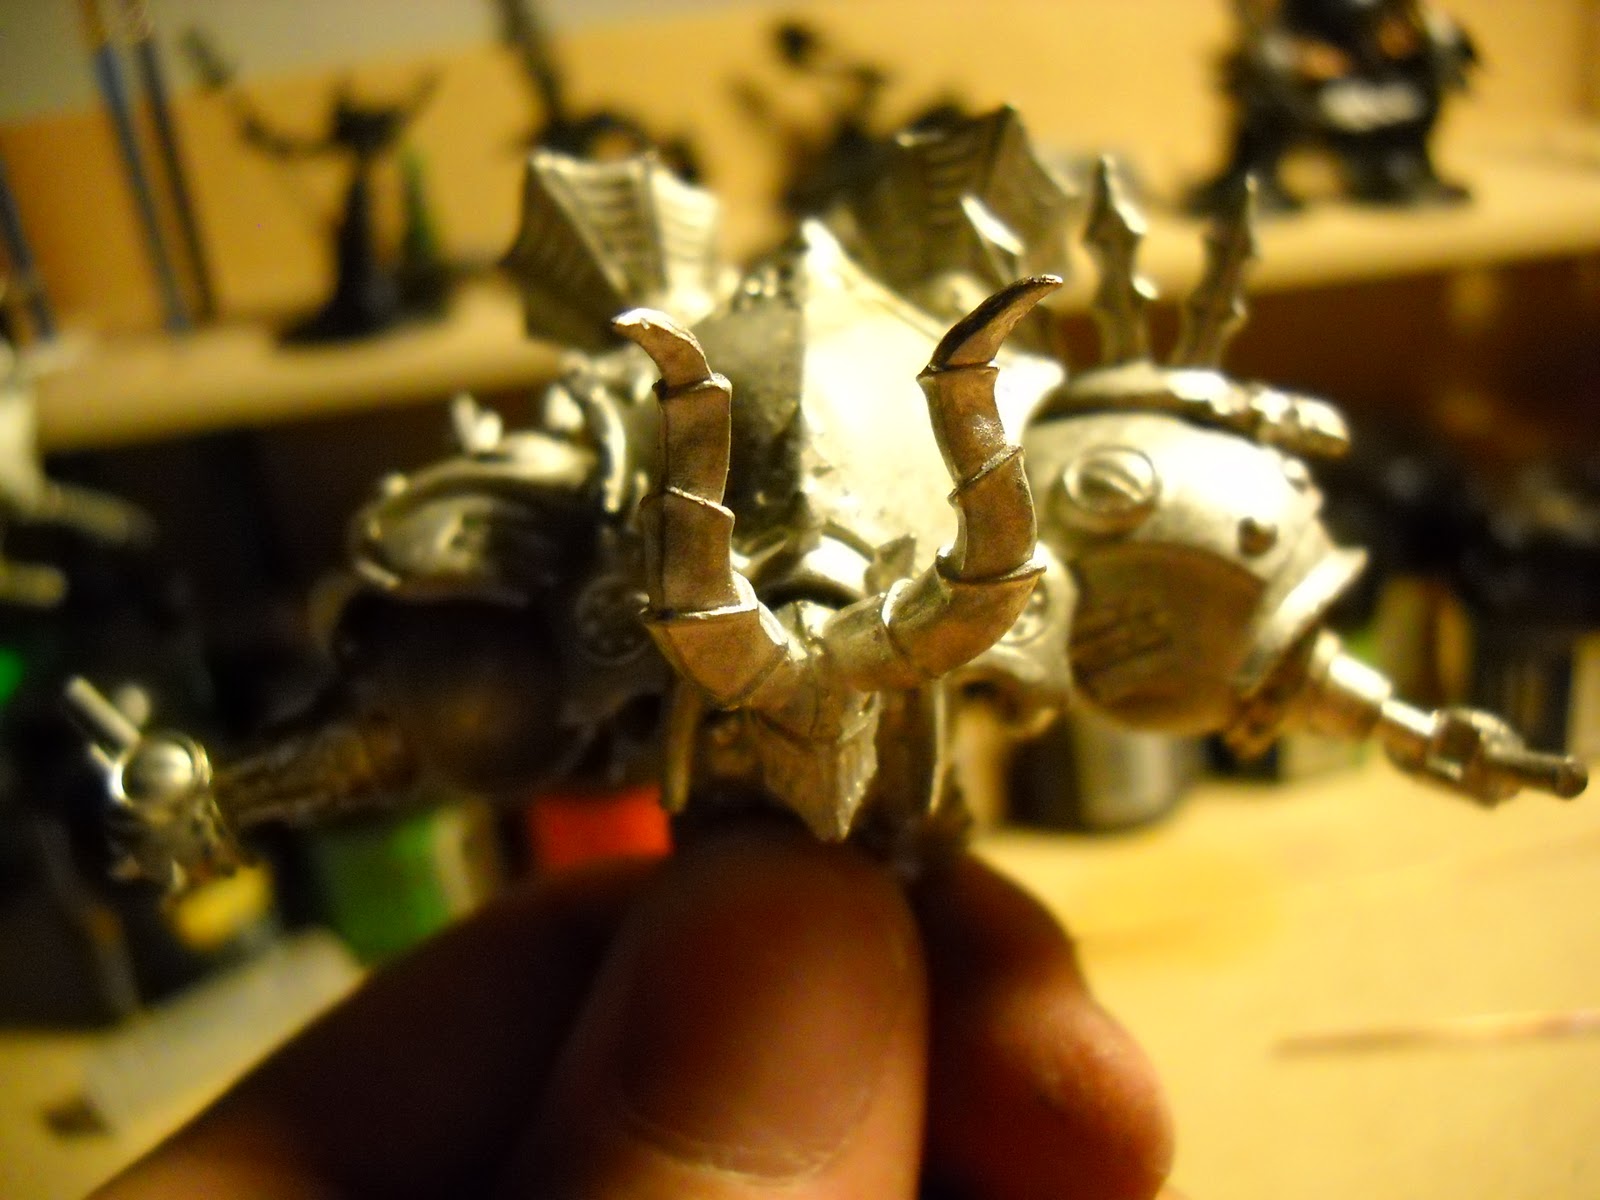
13. Next up the DJ will need his fearsome head to inspire terror or abomination technically! I stupidly wanted to magnetize the head, gave up and decided to just try and glue it on as best I can.... That is until most of the DJ fell apart....
 |
| "I may be a quadriplegic but I shall feast on your soul!" | |
14. Next up we're gonna start putting on his carapace and so we need to glue the spike frame to the larger back piece which will soon be going behind the deathjacks head.
15. Next up we must put on his carapace so that he isn't as vulnerable as he seems! Once again in all my wisdom I decided this didn't need a pin... Once again WRONG!
 |
| You may notice the soul and rib pieces already missing.... grumble grumble grumble..... |
16. So now back to the hand so we can let the carapace dry! We need to glue the lower part of the gauntlet so that the arms can be glued right into the hands with no trouble at all. I didn't pin this as it had a good structure and doesn't seem like a likely point to come apart.
17. Next up I decided that the glue on my magnets was dried enough and decided to glue the ball joints of the arms onto the shoulder. Again make sure to keep posing in mind. I decided I wanted the DJ's right claw in a high slash and the left arm to be in a low slash. The ball joints do not need the pins as there are plentiful contact points for the super glue to take hold!
18.Next up I decided to add the smoke stacks on and as the reoccurring theme I decided that pinning was too much effort and I skipped right past it with some gluing and a whole lot optimisim. Once again do not fall for the DJ's trap! BE SURE TO PIN EVERYTHING POSSIBLE!
19. Now I got a little too focused on building and started to forget to take photos. First I glued the hands onto the arms, once again no need for pins and a lot of superglue can do the job just fine. Next up we need to put the torso onto the pelvis. There is a huge joint on the torso and so I decided gluing should work just fine as well... this time I wasn't right and later the DJ will fall apart >.<
20. Now that your DJ is so close to completion you can begin working on putting your DJ onto the basing. I had to save the basing for last as the remains of the gorilla glue had not yet finished drying. Although its difficult to see from the poor photos (sorry my non pinned DJ just exploded in my hands and I was attempting not to rage quit. I decided to keep the DJ sturdy on the base by drilling the bottom of the legs and pinning it into the concrete. Be warned if you used the concrete I am fairly sure it ruined my drill bit but thats okay as I have hundreds of spares!
 |
| If you look to the right you can see a soul cage staring at me in clear resolution laughing as I had chose not to pin it.... |
 |
| The brown blob in the grey and silver blob is the copper rod supporting the legs to the base. (This will be covered by the feet so don't worry about making it to deep, or you could put small rocks around it to hide it.) |
21. Next up we glue the feet onto the legs so that it can cover up the pins. I chose to bend some of the toes with plies to make it seem like the DJ is trying to get traction on the rocks rather than blocky feet stumbling over rocks! I highly recommend taking the time to make your jack look as natural as possible rather than blocky and uncomfortable!
 |
| "Your death is soon!!!!!!" |
22. (This step is more for me rather than you smart viewers!) Now I need to repair everything that has exploded apart... This means clipping the bottoms of the smoke stacks and drilling pins into them and applying them to the back. Reapplying the head and pinning it so that it won't fall off and so I can obtain the direction I wanted rather than the one I compromised for with super glue! Then I had to resuperglue the soul and rib pieces back onto the torso. Next up the hands needed the spikes drilled and reattached. This was the most frightening part as the drill continued to slip and I nearly stabbed my hand several times! Please learn from my mistakes and be very very careful! Well as this whole day occurred due to the fact that I desperately needed a stress day... I kinda had a panic attack and needed to get away from the project as my mind slowly crashed. After my break, the deathjack giggled maniacally and snapped off its pelvis as well as having the carapace snap off! I then promptly pinned the pelvis to the torso and pinned the carapace to the torso... unfortunately I drilled through the carapace and will need to cover up the hole. Phew busy step huh?!

23. There you have it! YOUR FREE!!!!!! Well sorta.. as free as papa Toruk lets us undead folk be... None the less you should now have a fully complete and pretty awesome looking Deathjack that not only is nearly indestructible due to all your pinning but also several epic poses due to the nifty magnetic arms.

 |
| ^ This right here is a jack made of pure win! ^ |
Note: I had some trouble with the arm movement and discovered that If you bend the lower corners of the carapace inward it gives the arms more movement as well as looking pretty darn cool if I may say so myself!
Things you should have learned from me:
PIN! - Be sure you pin everything you possibly can or it will come back to haunt you later!
Drilling! - Be sure to be very careful while you drill for your own safety as well as preventing silly mistakes like drilling too far!
Gorilla Glue! - Be sure you know how to use it before adding it to models as otherwise you can make a huge mess you do not wish to clean in the long run!
Have fun! - Its important that you enjoy this project or otherwise all the time it takes will be miserable and you will hate the finished product. (Although I am overjoyed by how awesome he came out!)
SAFETY!!!!!- Please be safe the last thing I want to here is you slipped with the drill and got sent to the hospital. Please if you do not feel comfortable working with any of these tools please please please be careful or ask for help by someone more experienced than yourself!
Thanks for putting up with all this text! Please let me know what you think of this post! If I get some pretty good feedback I'll be sure to keep these posts up.... If not than these will likely die out as it took a lot of effort to write this up as well as take the photos. Until next time!

 4. So now you have found some random supplys and made yourself a nifty base. Next you will need to find a dynamic and stable pose that you think will work well with the base. I decided to show the DJ stepping up on a rock while pushing off his back legs. For the next step we might as well do the legs so we don't forget our nifty plan!
 11. Now I'm sure you all think I did the right thing and drilled the spikes and pinned them to the hand right? WRONG! I got far too lazy and decided that they would be able to glue on and stay on just fine. LIES!